|
|
Tutorials for Moodle 2.0 |
Dr. Richard L. Bowman
Harrisonburg, VA, USA 22802
Moodle is an open-source full-featured course management system (CMS), sometimes called a learning management system (LMS). Moodle version 1.0 was released in August 2002. Since then it has come through various stable versions, the latest is version 2.0 upon which this tutorial is based.
A partial list of Moodle's capabilities includes:
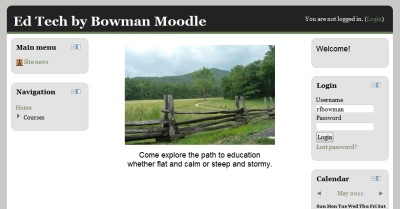
Above is a screenshot of my personal Moodle which I use for testing purposes. Each educational institution may rename (and configure) Moodle as it wishes. Most often the school's name is simply the name of the Moodle site, e.g., Rosedale Bible College in Ohio (USA). But sometimes a little bit more creativity is used, e.g., BCMoodle is the course management system for Bridgewater College in Virginia (USA) and JPoodle is used by John Paul II Collegiate in Saskatchewan (Canada).
Since Moodle is a very flexible CMS, the install of it at your institution will look different than this photo, but the functionality will be very similar. So continue following this tutorial as your learn to use Moodle.
Find out from your IT Center or educational technology specialist how to get to your institution's Moodle site. (Sometimes asking a student may be the simplest way to get the info!) After getting to the Moodle login page, log in using your username and password. After a successful login, the first page viewed in version 2.0 will usually be entitled, "(short name of your Moodle): My home." (Below is an screenshot from my Moodle.)
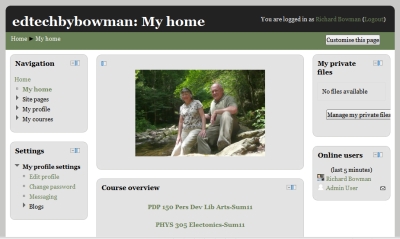
This page has been updated in Moodle 2.0, so let's look around. The look of this page may have been customized by the administrators of your school's Moodle, but this is the default placement of items with one significant change (keep reading for details). Notice at the top, just under the title for the page, is a "bread-crumb trail" showing where the user is in Moodle and thus the trail to go back to any previous layer in the site regardless of how deep the user has gone.
The left pane consists of a number of blocks associated with a particular user (giving useful links for navigating your site and settings you may adjust, such as your profile. The center pane in the above screenshot has a photo at the top (of my wife and me on our 40th wedding anniversary trip!) That is a modification I made as the user. In version 2.0 of Moodle, the user has the option of customizing the "My home" page. Below this block is the default listing of "courses" that I am a member of. This could be courses I teach or sites for committees I serve on or such like. Shortly you may take a look at one of your courses, but first let's make some adjustments to your profile.
Begin the process of getting set-up in Moodle by customizing your profile. Your name at the upper-right-hand side of the MyMoodle page is a direct link to your profile, so click on it and then on the "Edit profile" tab in order to be able to make the following changes.
One change in Moodle 2 compared to Moodle 1.9 is the addition of a dock on many pages and the ability to move blocks to or from the dock. Note that any changes made on your "My home" page will effect similar items on other pages, such as the main pages for your courses.
By default the dock is located on the left-side of the page. To move a block there, simply click on the small button on the upper right of a particular block to be moved. An enlarged photo of this button is shown below.
![]()
The -/+ icon will do the usual "hide" or "show" of the menu item. The next thin rectangle followed by a wider rectangle is the button to send the item to the dock.
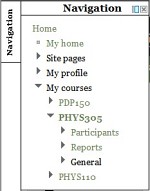
Below is how the upper-left-hand portion of the course main page shows up when the Navigation block has been moved to the dock. Hovering over the Navigation link will cause the Navigation menu to be displayed as in the right-hand screenshot below. When the menu is showing, clicking the "Undock this item" button will return the block to its original location on the page.
 |
 |
Use the dock to simplify the layout of your course page, if you think that is useful.
Several weeks prior to the beginning of a new term, the technology people at your school will probably take the initiative in populating each faculty member's "My home" page with the courses appropriate for the upcoming term. Then at the beginning of the new term, they will also place the registered students into each Moodle course. During the first couple weeks of the term, the student lists will be updated regularly, probably daily; while after any drop-add period, these updates may be done less frequently.
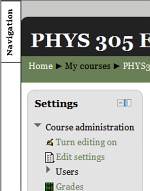
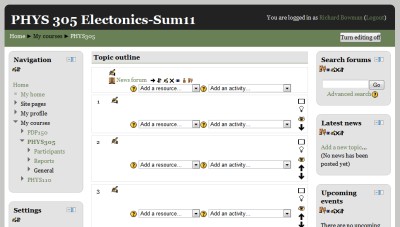
Before leaving this tutorial, go back to your "My home" page and click on one of your courses to see what an "empty" course looks like. It will be something like the screenshot below after you have clicked on the button to "Turn editing on."
For specific guidance in setting up a course in version 2 of Moodle, see the tutorial, "Creating a Course in Moodle."
In addition to a large number of help files that can be accessed through the help question mark graphics liberally scattered throughout Moodle, there are also Moodle docs for nearly every page that one can view in Moodle. Links to these docs are usually placed at the bottom of each page with which they are associated.
The main page of Moodle Assists (at Edt Tech by Bowman) gives numerous resources for learning to use Moodle. Some of these are from www.Moodle.org while others are tutorials from other sources. A few books are also referenced there.
If you have any questions or need additional assistance, contact your local help center or email Richard Bowman @ richard.bowman@edtechbybowman.ne .
©2009-11; Dr. Richard L. Bowman
![]()
Return to Ed Tech by Bowman Home
Created and maintained by: Richard L. Bowman ( richard.bowman@edtechbybowman.net ); last updated: 5-Sep-11.